Boo Banner

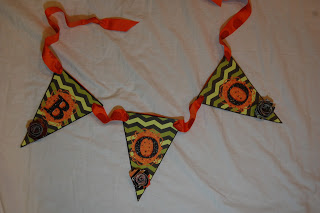
Hello Divas!  Lori here with a Halloween Banner.
I know it is a little early, but Halloween is my very favorite holiday and I start early every year with my decorations!!!
Today I made a BOO Banner to share with you.  I used my Gypsy and Cricut Expression to decorate my it.
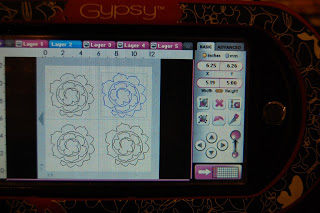
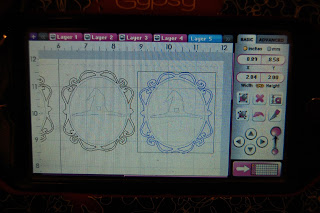
I used BOO! from CTMH Artiste sized to 2 inches.  I used Hide Contour to hide the inside cuts and the “!”.  I cut this out of glitter cardstock.  When I use glitter cardstock, I reverse the image (I am showing the original image here) and place my cardstock glitter side down.  I use multi-cut 2.  When I am done, I wash my mat with dish soap and a scrubbie to get the glitter off.
I cut these 3D flower shapes from CTMH Art Philosophy sized to 5 inches.  I rolled them up with my McGill tweezers and used liquid glue on the center to hold them together.
I needed something to mount the letters on.  I cut this image from Teresa Collin’s Chic and Scary sized to 3 inches.  I used Hide Contour to hide the inside cuts (oval and witch hat).
I used papers from my Halloween stash for all of my cuts.
I cut the triangles out of chipboard.  I traced and cut the paper to fit.  It was later (after I cut the paper) that I thought to cut everything out on the cricut…. at least I only had 3 banner flags!!
After I adhered the green paper to the banner flags, I used black acrylic paint to paint the edges.
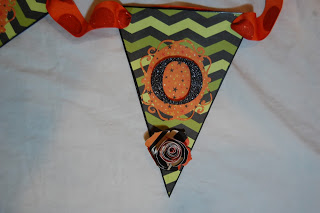
Here is a close up of the 3D flower that I rolled up.  You can also see that I pop-dotted the letters onto the orange paper.
I finished the banner off with some orange ribbon.
I hope you have as much fun decorating for Halloween (or fall) as I do!!!
You can see more of my work HERE.

Decorated Metal

I am a DIVA today – a Cricut DIVA!!  I have a fun project to share with you using my Cricut Imagine and Square 1 Masterpiece Repositionable Fabric.
For information about this awesome product, or to order some for yourself just go HERE.
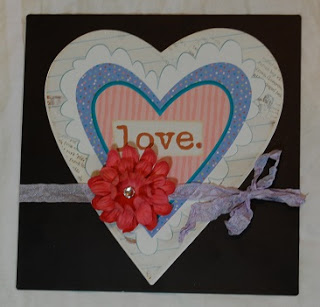
I used my Cricut Imagine and Imagine More Cards cartridge to print and cut out this heart image.  It is sized to 7.5 inches.
I put the 8 1/2 x 11 sheet landscape on my mat to fit the images.
I found these 8×8 metal wall decor pieces at Michaels in the Dollar Bins.  They are normally $2.00, but were 40% off – score!!!  I thought the image was permanent and I was prepared to sand and paint the metal, but these are stickers that peeled off pretty easily!
I peeled the heart off the paper backing and stuck it down.
The image is cute, but pretty flat so I grabbed some flowers and ribbon!!
I layered three flowers.  These are Recollections flowers from Michaels and come in two sizes.  I layered two large flowers on the bottom (one upside down) and a smaller one on top.  I fastened them together with a brad and put a rhinestone gem on top.
I tied some 3 Girl Jam crinkle ribbon around the metal piece.
Here is a great wall decor piece.  I tied the ribbon on and used a glue dot to adhere the flower to the ribbon.  This piece is totally temporary as you can remove the Square 1 fabric and change the look!!
You can find more of my work on my personal blog HERE.  Thanks for stopping by!

Froggie Gift Bag

Hi!!  Lori here from ScrappinMyStressAway with a fun gift bag.  I used my Cricut Imagine and Nursery Tail cartridge to make this cute gift bag for my friend’s baby boy!
I print and cut out the image at 5.5 inches and 2.5 inches.  I inked the edges with Vintage Photo distress ink.
I cut a brown mat and used some washi tape to make a side border.  I put two pieces of tape side by side.
I adhered the brown paper to a kraft gift bag.  I then adhered the frog image to the brown paper.
I cut a piece of kraft cardstock to 3×6 inches and folded it in half to make a gift tag.  I trimmed the brown paper to 2.75×2.75 inches and put one piece of washi tape on the side.  I adhered the paper to the front of the card, and the frog image on the paper.
I punched a hole at the top corner of the card (by the fold) and tied the gift card to the handle with some hemp cord.
Here is a super cute gift bag with matching gift tag!
You can see more of my projects on my BLOG!

Bunny Love (LO)

Hi ~ Lori here from ScrappinMyStressAway and I have some Bunny Love to share with you today!!!
This is my beautiful niece and her bunny on Easter this year.  I have all boys so I don’t get to create a girly layout very often, but I make sure to go girly for Easter each year!!
I am excited to share my layout at Cricut DIVA today!!
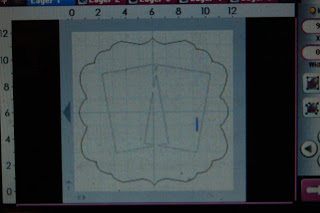
I started out putting two 4×6 rectangles on my gypsy (to represent my photos) overlapping them the way I planned to do on the page.
I opened another Layer and grabbed this scallop shape from Artiste.  I sized it to 11.07 inches.
I wanted a border punch look but honestly don’t have the patience for the actual punches!!!  Luckily, MS Elegant Cake Art cartridge has several borders that are just like her punches.
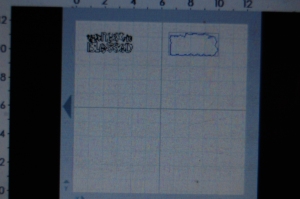
I welded three of these together sized to 1.10 inches.
You will notice on my layout that the cuts inside the scallops did not cut out.  I was having trouble with this paper as the back side has a glittery flower pattern on it.  The paper kept slipping, so I just hid the inner cuts after ruining two cuts!!
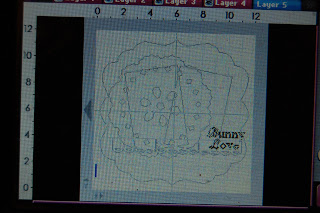
I added this doily on another layer.  This is also from Elegant Cake Art and is sized to 7.82 inches.
I opened up another Layer and positioned my title where I thought it would go.  The font is Elegant Cake Art and the letters are sized to .77 inches.
I used the negative piece of paper as a template and adhered the letters down on my page.
I ended up moving my title to the top because I wanted ribbon to go right where I put the title!!  No problem, just used my cricut spatula to carefully peel the letters up!!
I inked the white photo mats, scallop background piece and doily with hot pink ink.
I needed some flowers!!  I used Mother’s Day Bouquet for my flower shape.
I cut the flower out five different sizes ranging from 1.18 – 2 inches.
I used two shades of pink cardstock, as well as the paper I used for the scallop and the border.
I inked the edges with the same hot pink ink I used for the background pieces.  I used my stylus to curl up the petals.  I adhered the layers together with glue dots and put a clear gem in the center.
I put in three butterflies.  These were used with Square 1 Masterpiece adhesive back fabric and you can see how I made them HERE.
Here is my title at the top and a butterfly in the corner of the photo.
Beautiful layout of a beautiful girl!!!
You can see more of my work on my BLOG.

Nest Mini Album

Lori here from ScrappinMyStressAway and I am a Cricut DIVA today!!!
I took a chipboard/burlap mini album from Michaels, a 6×6 American Crafts Color Crush paper pad (also from Michaels) and added my Gypsy to create this fun mini album.
I flipped every other page so I would have two pages with the same papers together, then two pages with burlap.  Doing this makes the pages more bulky, so I purchased bigger rings.
I made this album with my friend Robin in mind.  She just opened a shop in March called Robin’s Nest where she sells re-purposed items.  She is quite talented and her shop is doing very well!!
I used a bird from Sophie for the cover.  I sized it to 13.53 inches (2.42 inches using Real Size as this cuts with a bird cage).
I used Storybook for the font and sized NEST at 1.13 inches.
I used a piece of paper from the paper pad that was all different shades of green with a watercolor pattern.
I added the linen lace to the bottom and some gems.  It still needed a little something that I found a little later….
2013.June 012
I found the sentiment “this nest is blessed” on 3 Birds on Parade for the first page of the album.
I sized it to 1.59 inches and cut it out of pink (light and bright) cardstock.
I pop-dotted it to the bottom of the photo mat so you can slide a photo behind it.
I added a bird from Sophie (shown two photos below) and I also pop-dotted it on the corner.
The next pages showcase birdies from Straight From the Nest sized to 1.25 inches.
I made a pocket using my ATG gun to put tags for journaling.  You can also tuck in extra photos and momentos.
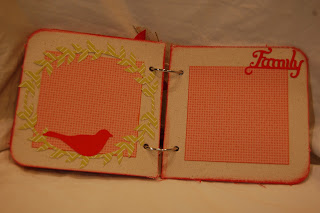
I found the leaf wreath with bird on Lacy Labels and sized it to 6.35 inches.  I cut the wreath out of green patterned paper and the birds out of hot pink and dark blue-green papers to match the patterned papers in the album.
The word “Family” is from Letter Envy and I sized one for the cover at 1 inch and one for the inside page at 1.47 inches.
I like how the wreath frames the photo mat.
This tree came from the Heritage cartridge.  I sized it to 5 inches and cut it out of the dark blue-green cardstock.
The tree was perfect for the back cover!
Here you can see the bird is pop-dotted on the cover.
I added the word Family to the cover.  I have a theme with each mini album I make.  Even though many people get that a Nest is like a House for a family, I did not want people to assume I lived with all birds!!
I tied some ribbon to the rings to finish it off.
You can see more of my work on my blog HERE.

Summer Fun Mini Album

Hello ~ Lori here from ScrappinMyStressAway!!
cricutDIVA image
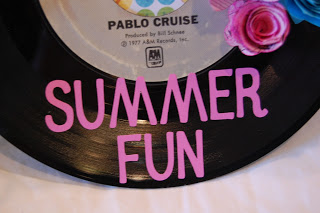
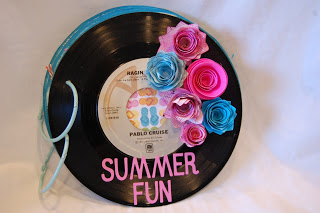
I found these 45 records at the thrift shop and thought they would make fun mini album covers!!
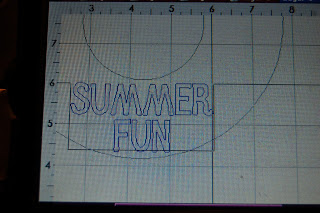
I re-created the record on my Gypsy using two circles sized 7 inches and 3 inches.
I used vinyl for SUMMER FUN using the font Cherry Limeade sized to .75 inches.
I sized my letters by leaving the layer with the “record” on it open.  That way I knew my title would fit.
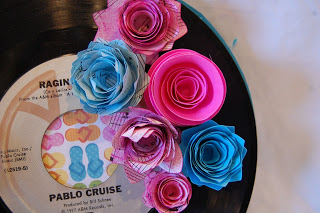
I cut out 3D flowers from Atriste sized from 3 – 5 inches out of sheet music and cardstock.
I inked the sheet music to match the cardstock.  I used my tweezers to roll up the flowers and liquid glue to adhere them.  I attached them to the cover with glue dots.
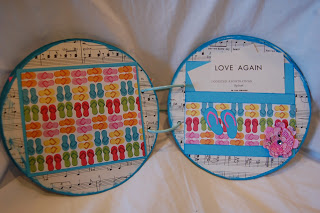
I traced and cut out chipboard circle pages and covered them with sheet music.  I painted the edges of the pages with a bright blue acrylic paint.
I made some photo mats and cut out some flip flops and beach tags to attach to the corners.
I cut out a wave and some fish and tied the tops with twine.
I like to make a pocket for my mini albums and include tags or coordinating paper scraps.
I cut out layered flowers from Mother’s Day Bouquet sized from .88 – 2.53 inches.  I cut them out of sheet music.  Cutting did not go well as the paper is on the thin side, but I got enough to make my flowers.
I cut out some images from Life is A Beach.  The flip flops are 1.82 inches.  The tags are 1.75 inches.  The gecko is 3 inches.  I cut the images out in cardstock.
I tied a little twine on the  tags.
I attached the gecko to the back cover.
I hope you like my unique mini album.  I had a lot of fun making it!!
You can see more of my work on my BLOG!!

Yummy Note Card Set

cricutDIVA image
Hi!!  Lori here from ScrappinMyStressAway and I am super excited to share this Yummy note card set today at CricutDIVA!!
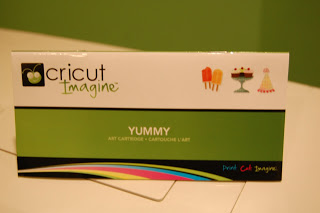
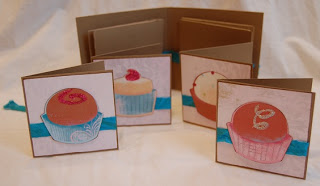
I made a set of 3×3 cards with truffles on them from the Cricut Imagine Yummy Cartridge.
I printed out the light pink distressed-look pattern on white cardstock to use as background paper for my cards.  I cut them to 2 7/8″ squares and adhered them to my note card (3×6 folded in half).
I printed and cut out the three truffles and mini cake at 2″ each.  I inked the edges in Vintage Photo ink, and added a little stickles to each piece and let dry.
Before I adhered the patterned paper to the card, I wrapped a piece of 3Girl Jam 1/3 the way up the paper.  I chose the blue to bring out the bit of blue in each card.
I got the We R Memory Keepers Envelope Punch – super cool new toy!!!  I wanted to make envelopes for my little note cards.
Making the envelopes were fun, once I watched a YubeVideo on how!!
I found this Enveolope Gum at Archivers to seal the envelopes.  I just painted the glue on and let it dry.  It just needs a little water to seal.
I made a little folder to keep the card set in – this makes a great gift idea!!
I started with a piece of Kraft cardstock and cut it to 8 1/2″ x 6″.  Placing the paper horizontally on my Score Board, I scored 2″ up from the bottom to create the pocket.
I turned the paper to score the fold lines.  I scored at 4 1/8″ and 4 3/8″.
I used my ATG gun to adhere the center of the bottom flap (pocket) to the spine of the folder.
I punched a hole on each side of the pocket.  I ran a piece of 3Girl Jam ribbon across the inside of the folder and used a glue dot in the spine to hold the ribbon down.
When you close the folder, simply tie a pretty bow.
What a Yummy Gift card set!  These are great for teachers, friends or even secret pals.  I included this set in an Easter Swap gift with another paper crafter!
You can find more of my work on my personal blog HERE.

Graduation Cards ~ Sentimental Saturday

Happy Graduation Cards!!
cricutDIVA image
Hello – Lori here with some Graduation cards to share!!! Welcome to Sentimental Saturday where we post card projects only!!
My middle son is graduating next month and he has a lot of friends. I am making a LOT of graduation cards!!! I typically don’t like to mass produce my work, but in this case I would drive myself crazy (and run out of time) if I didn’t!
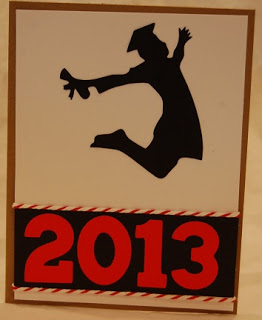
I did use a file from Silhouette to cut out the jumping graduate and hats. I am new to Silhouette but I still prefer the Gypsy. I can file all of my project pieces in one place and refer back to them when I need measurements for blog posts.
I LOVE having the option to open several layers in a project too. This project has 12 Layers and three card designs.
I used CTMH Artiste for the scalloped circle. I sized them to 4.62 inches (3 inches using Real Size).
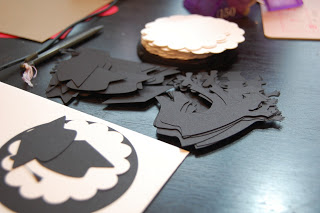
On one page, I hid the outer circle so I cut out the scalloped circle. I cut these out in white cardstock.
On the second page, I hid the inner scalloped circle and cut out the shadow circle.  I cut these out in black cardstock.
I used Birthday Bash for the numbers and sized them to 1.25 inches.
I custom the colors of the numbers to match the school. I have an entire page of 2013 to cut out in blue for my son’s school. The red and maroon are for some of his friends from other schools.
I used my 5″ Xyron to put adhesive on my numbers.
I saved a piece of the leftover cuts to use as a stencil. I placed my numbers inside the template and carefully peeled off my blue “leftover” paper. I do this to line up my letters (or in this case numbers) perfectly every time!
I added some matching twine and stickles to finish the card front.
I punched a 2″ circle and stamped the sentiment inside.
This card I did a little different on the outside.
I am off to finish the blue cards!!!
Thanks for stopping by!!
You can see more of my work on my personal blog:  http://www.scrappinmystressaway.blogspot.com/

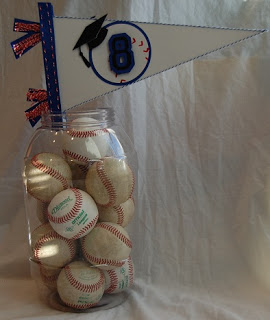
Baseball Pennant

cricutDIVA image
Hi!!!  Lori here from ScrappinMyStressAway and I am so excited to share my very first CricutDIVA post with you today!!
My middle son is graduating from High School in just over a month (sniff, sniff). He is also a baseball player (catcher) and I have been working very hard at making his graduation party decorations.
I was inspired by a post on Pinterest to create my centerpiece.
I started with my Gypsy Girl and opened a 12×24 mat.
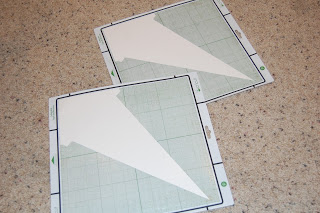
I used the shadow of this pennant from Locker Talk sized to width 15.24 x height 7.12.
Once I sized the shadow layer to 7.12 inches, I put all of the pieces for the banner on layers of my Gyspy all sized to 7.12 inches.
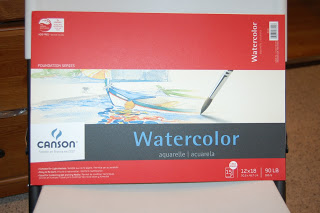
I used watercolor paper to cut out the base of my pennant. Watercolor paper is very sturdy and it cuts well on the cricut.  I use it for banner flags and mini album pages too.
I used multi-cut of 2 and the blade depth at 5 (which is the depth I use for cardstock).
I put the pennant in the next layer of my Gypsy, sized the same. I wanted the pennant to be white and the tassles to be blue, so I hung the tassles off the mats.
I cut out two in white cardstock, one for each side.  I trimmed off the edges and adhered one piece to each side of the watercolor paper layer.
In Gypsy Layer 3, I put the tassels, borders and the numbers from Varsity Letter sized to 2.28 inches.
I cut them out in blue paper (I call this shade Titan Blue for my son’s high school).
In Gypsy Layer 4, I put the baseball layer from Boys Will Be Boys sized to 6.15 inches.
On the bottom half of the mat, I put the numbers from Varsity Letter sized to 2.28 inches.
I also put the graduation cap from Recess sized to 1.82 inches.
I cut out the baseball in white cardstock and the rest in black cardstock.
I decided later I wanted a second graduation cap so I copied and pasted one to the next Gypsy layer along with the base of the baseball. I cut them out in black cadstock.
I opened a final Gypsy layer and kept the eyeball open on the tab so I could see the baseball base (shown in grey). I copied the baseball onto this layer and sized it to 6.74 inches to create a shadow. I cut the layer out in blue cardstock.
I adhered the blue tassels on the pennant. I cut several strands of twine and tied a knot in the center. I used my ATG gun to adhere them to the blue tassels. Once adhered, I trimmed the edges of the twine.
I used my Sew Easy to punch holes in the border piece. I used the red and white twine to stitch around the edges.
I pop-dotted the border piece to the pennant.
I adhered the baseball layers and pop-dotted the number 8 (Tyler’s jersey number) and the graduation cap to the pennant.
I used a liquid glue pen to adhere blue and white twine to the edges of the pennant.
Here you can see the dimension.
On the other side of the pendant, I adhered the numbers and pop-dotted the second graduation cap.
Before I adhered the border to the pennant, I used ATG to adhere a wilton cookie/cake pop stick to the pennant. I reinforced the stick with some tape.
I pop-dotted the border on with an extra layer of pop dots to account for the height of the stick.
Here is the reverse side of the pennant.
This will be a fun center piece for one of the food tables at Tyler’s graduation party.
Thanks for stopping by today!
You can see more of my work on my personal blog HERE.