Sentimental Saturday~Spooky Halloween

Are you getting into the FALL season? I am and I’m so happy it’s official this Sunday. I made this halloween card to get into the spirit. I have a few college students I’ll be sending care packages to. I went into my “OLD Stash” to make this card. I’m hoping I’m not the only one that has “OLD” stuff.

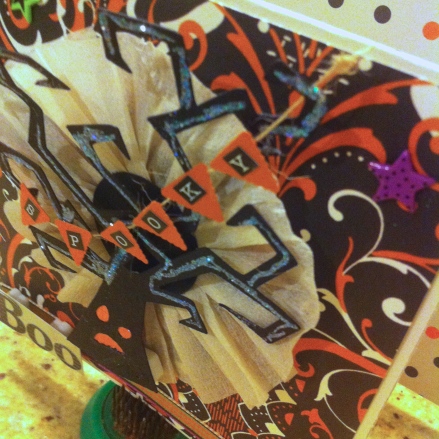
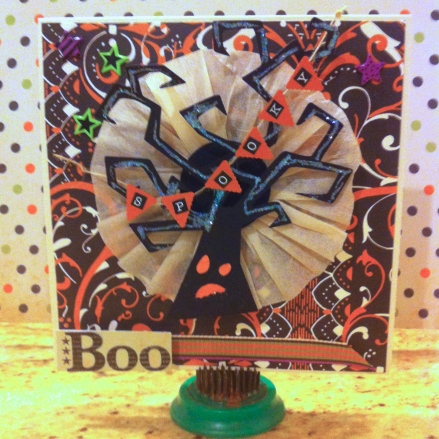
I made it a 6×6 card using bazzil cream and the printed back ground paper is from Anna Griffin #AG1538. I made the rosette from vintage crepe paper streamer from my stash. I cut the tree from the Happy Haunting cartridge <tree-s> at measurement at 3.944(w)x4.736(h) with black card stock  and I added orange paper behind the face. I add glitter on the tree branches.

Halloween Boo Card

The letters are from The Girls’ Paperie by Margie toil and trouble sticker market. The mini pennants are punched from the ek Success punch set. I attached the banner to some thin jute.

Halloween Boo_Liz Mullen

I added some halloween brads from queen & co. called star-halloween (old,LOL). I used foam dots to pop the tree and the boo sign.

I invite to come on over to my blog ScrapiliciousLife I have family recipes and other crafting ideas that I hope inspire your creativity.

Creating and sharing with LOVE,

Liz

Designed by:  Liz Mullen

Cricut Machines and Tools:  Expression e2 and the craftroom

Cricut Cartridges Used:  Happy Haunting

Other Supplies Used:  Bazzil card stock, jute, ek success punch set: mini pennants, glitter, vintage streamer,foam dots, queen & co brads, anna griffin paper, Toil and Trouble sticker pad

Sentimental Saturday~So Happy for You

Happy saturday everyone! Today I have two cards for you that I made for my daughter and my niece. Both of them had some exciting things happen to them recently and I wanted to send them a little card to recognize their achievements. I used a technique using  Art Bar crayons. I tried to do an ombre watercolor background with a screen layer on top.

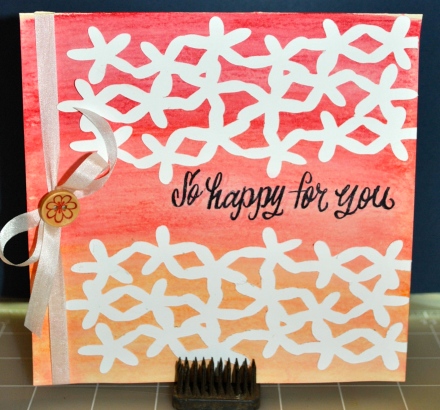
So happy for you card

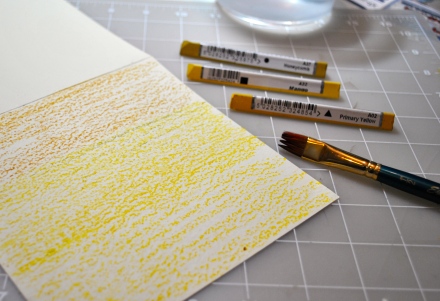
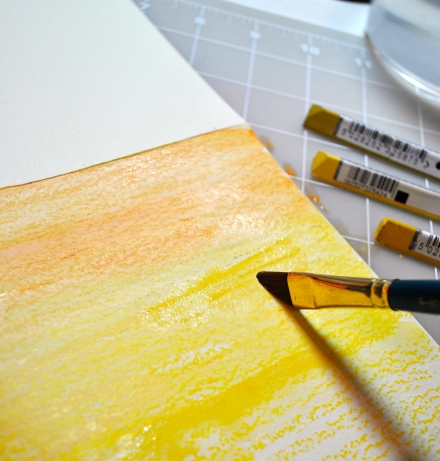
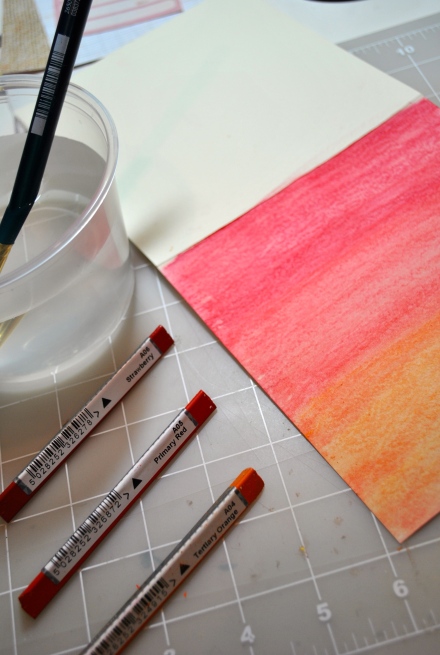
For the card bases  I cut a 6″x12″ card stock and folded it in half. On the front of the card I colored it with the Art Bar Caryons (you could use Gelatos)  Use water to dilute the color to blend.

ArtBar ombre technique

adding water to the Art Bar

ombre technique with ArtBars

DSC_0654

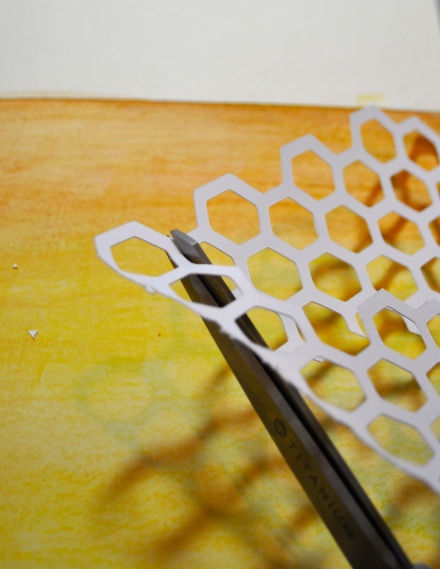
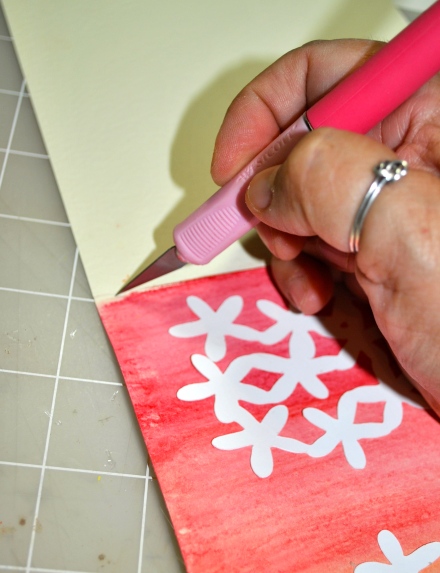
Next I cut the Layering screens with my expression2 and the CCR (Cricut Craft Room). I used smooth bazzill card stock . The 1st image I used is from the PaperDoll Dress-up cartridge it’s on page 78, The Border Blackout. I used three of those image with the middle one flipped and then I nestled them together so that I could weld them to make one piece. The measurement was about 5.7x 2.6 and then I copied and pasted another image because I used two of them.

For the 2nd card I use the CCR exclusive Teresa Collins Basic images. The measurement  I used was 5.6×5.6 and I cut it into pieces I liked for the card.

cutting screen

After my e2 cut my images I ran them through the Xyron to add the allover adhesive. I like to go over the edges so that there isn’t any adhesive left on the edges. I have an old Xyron and I feel like I have to do this step. I don’t know if the new machines leave excess adhesive on the edges.

Xyron technique

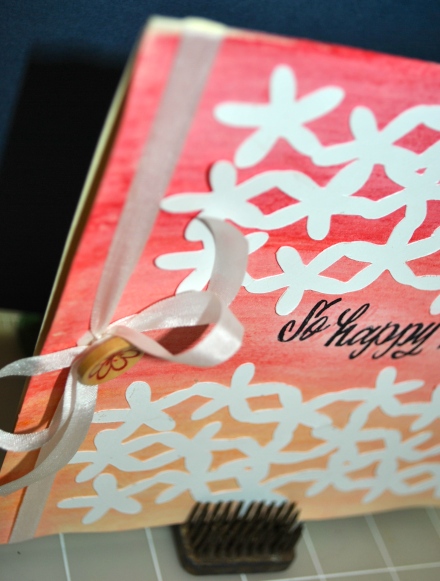
After I set the screen layer where I want it I stamped them. The red card I stamped with one of my favorite stamp set called Grand Greeting from Lawn Fawn and the Yellow card I use a stamp set that I got at Michael’s in the clearance bin. That set is from a company called Ditto. On the red card I made a slit on the upper left side of the card right on the fold so that I could thread the ribbon through it.

DSC_0646

 and tied my bow and placed my button.

close-up

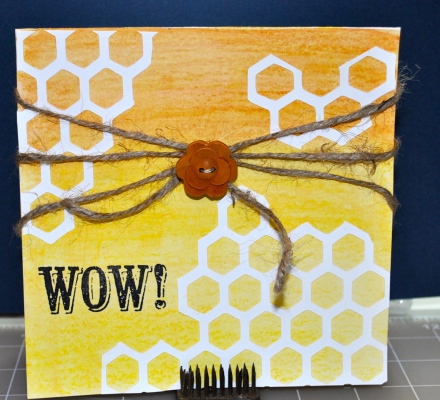
With the Yellow card I used jute and a wood button.

WOW! card

The last thing I do when I make cards is sign them and I use this stamp that I got at an expo. It’s from Endless Creations I like it because I can also cut it with the 1 1/4″ scallop punch. How do you sign your cards?

handmade by stamp\

Thank you for stopping by today. Have a wonderful & safe holiday weekend!

Creating and Sharing, I invite you to visit my blog

Designed by: Liz Mullen

Cricut Machine and Tools: Expression 2 Anniversary Edition, CCR

Cricut Cartridges:  PaperDoll Dress-up cartridgeTeresa Collins Basic images Grand Greet

Other Supplies Used:  Art Bar crayons, XyronGrand Greeting from Lawn Fawn,  Endless Creations

Our Love Story

Our Love Story

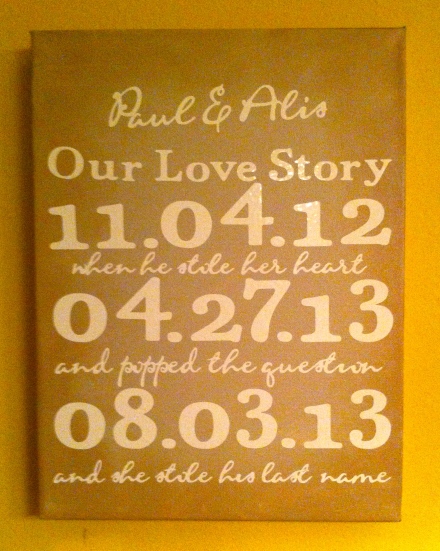
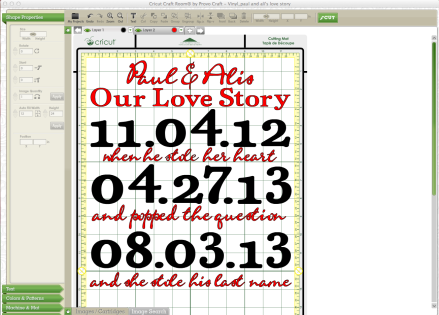
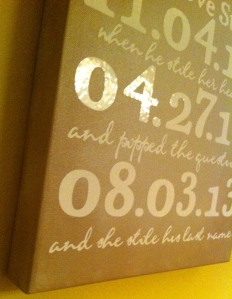
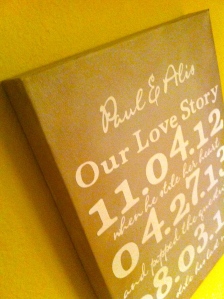
Hello Everyone, I can’t believe that it’s the end of July. My Daughter starts her senior year in just a few weeks…Yikes! I made this wall art for my Godson’s bride to be shower gifts. I got the Idea from one of my pins from Pinterest.  I’m loving the vinyl! Here I used white vinyl on a 12″x14″ canvas. I painted it with Martha Stewart’s Lake fog acrylic paint. I inked the edges with Tim Holtz,  vintage photo distress ink.  Below is the screen shot of the set up in the craft room. Originally I thought of cutting it out in two colors, hence the two colors and two mats. I used the gypsy font and art philosophy font. I also used the 12×24 mat.

screen shot of craftroom

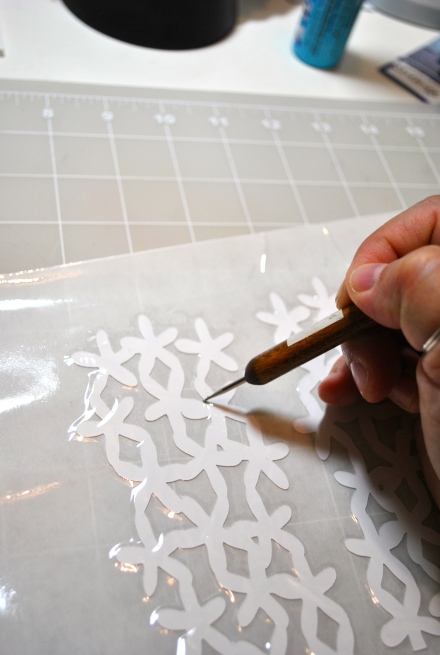
I cut it out, weeded out all the little bits. It takes a bit of time and then added it to the canvas.

IMG_3688

I made another one for my niece and she loved it.

IMG_3689

I hope you are enjoying the end of your summer (really the middle but it fills the the end with school being only a few weeks away). I invite you to visit my blog over at ScrapiliciousLife

Designed by:  Liz Mullen

Cricut Machine and Tools:  Expression 2 Anniversary Edition and Craftroom

Cricut Cartridges:  Gypsy Font and Close to My Heart Art Philosophy

Other Supplies: 12×14″ canvas, vinyl, martha stewart acrylic paint, and distress ink

Sentimental Saturday~ Hello

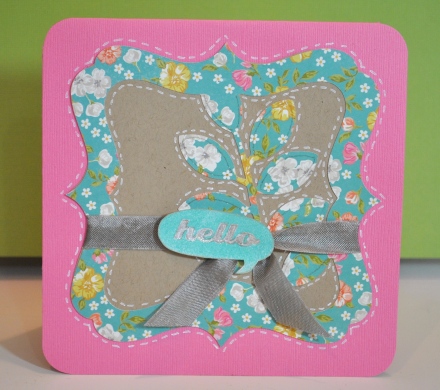
Hello, it’s Liz here on this Sentimental Saturday. Today I have a simple Hello card made from the Art Philosophy cartridge.

ss~Hello Card

The base is 6″x12″ Bazzill card stock folded in half . The card image is on page 43. I cut the <square3> at 5.5″ out of kraft cardstock and the decorative layer (shift) I cut out of this pretty paper from the Simple Stories 6×6 pad called Vintage Bliss. The sheet I used is called Smile Big. I used the corner chomper to round the corners.

ss~Hello Card

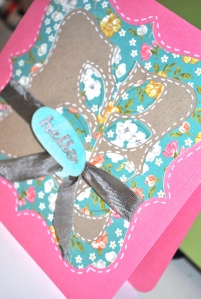
I wrapped some seam binding around the whole piece and I stamped the Hello and cut it out by hand and I used a glitter pen to color in the hello and I used foam dots to give it a pop. I stitched around with my favorite white pen, the Uni-Ball Signo white pen.

I invite you to visit  my personal blog ScrapiliciousLife

Thanks for stopping by today, wishing you a wonderful weekend.

Creating and Sharing~ Liz

Designed by: Liz Mullen

Cricut Machine and Tools: expression2,

Cricut Cartridges: Art philosophy

Other Supplies: seam binding, foam dots, signo white pen, Simple Stories 6×6 paper pad, corner chomper

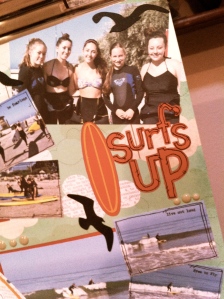
Surf’s Up 12×12 Layout

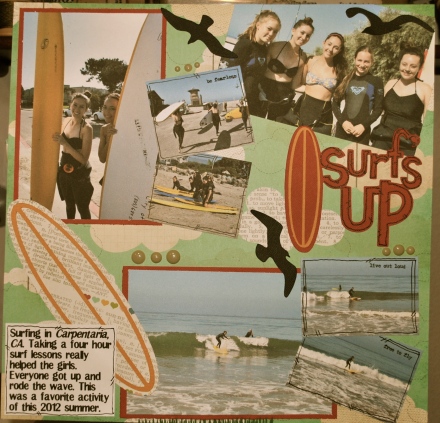
Happy First day of Summer Everyone! Do you all have your summer bucket list written out? Well, I know my daughter and her friends are going to be returning the the beach to hit the waves again. Last summer I took them to Carpentaria Beach were the city has classes that run all summer long. The Layout below is of first class they took last year. It’s a simple layout but I like that I got 7 pictures on one page.

DSC_0519

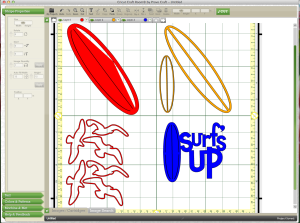
I used the Life is a Beach cartridge I used the surfboard, the surf’s up phrase and the seagulls. I like using the Craft Room to layout my images so that I only make one run though to cut all my images.This is how I position the images.

Screen Shot 2013-06-20 at 7.35.10 PM

The sizes of the cuts are

Surfboard 4.375(W)x 5.569(H)

Surfboard layer 4.083(W)x 5.333(H)

Seagulls 3.847(W)x 2.833(H) 2 times

Surf’sUp Phrase 3.847(W)x 3.653(H)

Surf’sUp Phrase layer .917(W)x3.314

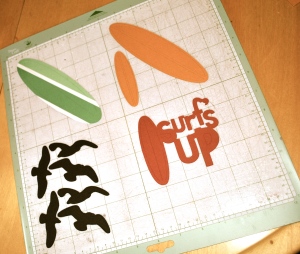
and this is how they looked when the cut was finished

DSC_0518

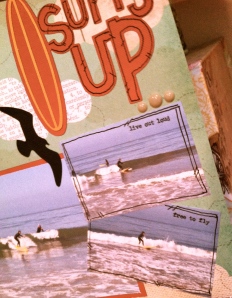
I didn’t like the way the strips looked on the surfboard so I ended up flipping the image and I actually liked the patterned so much better. I used paper from the Simple Stories called I (Heart) Summer, DayDream and Feel the Breeze plus some Bazzill cardstock.

IMG_3496

I ended up using some of Tim Holtz idea-ology Remnant rubs-words plus I added a border to the smaller photos, journaling block and

IMG_3495

 to the phrase with a black pen. I also added some enamel dots from My Mind’s eye from Michael’s.

Thank you for stopping by today I hope you all have a super fun and safe summer.

I invite you to stop by my personal blog ScrapiliciousLife to say Hi.

Designed by: Liz Mullen

Cricut Machines & Tools Used: Cricut Expression 2 Anniversary Edition and Craft Room

Cricut Cartridges Used: Life is a Beach

Other Supplies Used: Black pen, Remnant rubs-words, Bazzill cardstock, My Mind’s Eye enamel dots,Simple Stories I (Heart) Summer paper collection

Sentimental Saturday- Happy Birthday

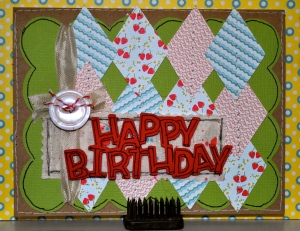
I’m so excited and nervous that this is my first post. I decide to make a birthday card. I don’t know about you but it always seems like I’m in need of one. I used the 6×6 paper pad from Lilybee design called Sweet Shoppe

.DSC_0485

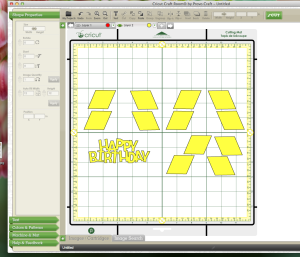
I used a kraft base card  5 x 6.5 that comes with it’s own envelope from Michaels. I used the CCR which I really enjoy. I used three different cuts, two from the CCR exclusives. The diamonds(1.917 w x 1.292 h) and the green mat(6.25w x 4.73h) are from the Daughters Layout and the Happy Birthday(4.181w x 1.681h) is from Cricut font and Basic shapes.

Screen Shot 2013-05-21 at 10.34.26 AM

This is how I positioned my cuts on my mat. I like to put my cuts at different places on my mat so that it doesn’t cut on the same place and wear my mat out.  It’s so easy to do this in the CCR.

DSC_0491

Once everything is cut I sewed the diamonds together by first running  a bit of score tape on the back of them to help me keep them together. Then I glued  them to the green mat and ran the sewing machine through all the pieces. I did use a black marker around the edges of the green mat. It was an after thought so I just did the edges that were showing through the diamond pieces.

DSC_0492

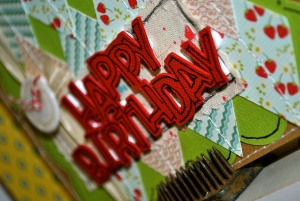
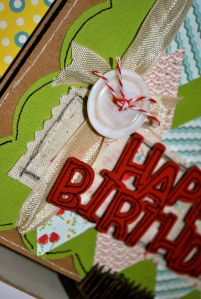
I also stitched  the edges of the card base and I added a piece of muslin that I also stitched down but before that I  added some Heidi Swapp color shine by splattering a bit of two colors and some doodles with the black marker. I ran the black marker around the letters and used foam dots to adhere it the card. I also used a vintage button and some seam binding.

Thank you for stopping by today. If you would like to see more of my work I invite you to visit my blog

Designed by: Liz Mullen

Cricut Machine and Tools: expression2, Cricut Craft Room, sewing machine

Cricut Cartridges: CCR exclusive: Daughters Layout, Cricut Font & Basic Shapes

Other Supplies:Lilybee design 6×6 paper pad; Sweet Shoppe, recollections kaft card & envelopes, score tape, black felt marker, foam dots, muslin, Heidi Swapp color shine