Hello Kitty 1st Birthday Card

Lillie's 1st Birthday Party 08-02-14(100) Lillie's 1st Birthday Party 08-02-14(101)

Hello from Brenda of Random Thoughts of a Scrapbooker!

Here is the card I made for my granddaughter’s first birthday.

This is an A2 size card (4 1/4 x 5 1/2″). The base and all solid cardstock is Recollections. The patterned paper is Lucy (a retired Close To My Heart (CTMH) B & T paper pack).

For the front of the card, the patterned paper layer measures 4 x 5 1/4″. I used the Hello Kitty Greetings Cricut cartridge to cut Hello Kitty at 3 1/2″, I used the Hello Kitty Font Cricut cartridge to cut the number 1 at 2″ and I used the Stampin’ Up! Bitty Banners stamp set and CTMH Archival Black exclusive ink pad for the sentiment and cut it out using the coordinating die set and my Cuttlebug. I used Recollections glitter on the flower on Hello Kitty’s head and the number 1.

For the inside of the card, the patterned paper layer measures 4 x 5 1/4″ and the solid layer measures 3 x 4 1/4″. I used CTMH’s retired Card Chatter – Birthday stamp set and CTMH’s Archival Black exclusive ink pad for the sentiment.

Thanks for stopping by and visiting our blog!

Designed by: Brenda Halstead of Random Thoughts of a Scrapbooker

Cricut Machine and Tools Used: Cricut Expression 2 AE and Gypsy

Cricut Cartridge(s) Used: Hello Kitty Greetings and Hello Kitty Font

Other Supplies Used: CTMH stamps,ink and paper, Stampin’ Up! stamps and dies, Recollections cardstock and glitter


Mickey 2nd Birthday Card


20140720_211133

20140720_211256

Hello! Brenda from Random Thoughts of a Scrapbooker here.

I made this card for my grandson’s 2nd birthday. It is an A2 size card (4 1/4 x 5 1/2″). I used Recollections cardstock for the base and all solid cardstock used. The patterned paper is Stampin’ Up!. I believe it is the Regal paper collection.

For the front of the card, I cut the patterned paper at 4 x 5 1/4″. I cut the solid blue at 3 1/2 x 4 3/4″. I used the Micky & Friend Cricut cartridge to cut Mickey Mouse at 3 1/2″. I used the Pooh & Friends Cricut cartridge to cut the birthday hat at 1 1/2″. I used the Mickey Font Cricut cartridge to cut the number 2 at 1 1/4″.

For the inside of the card, I cut the patterned paper at 4 x 5 1/4″. I cut the white layer at 3 x 4 1/4″. I used the Close To My Heart Card Chatter – Birthday stamp set (which is retired) to stamp the sentiment with CTMH’s Ruby exclusive ink. The birthday hat on the inside was cut from the Pooh & Friends Cricut cartridge, but I can’t remember what size because I was originally going to use it on Mickey but it was too big.

Thanks for stopping by and looking at my card!

Designed by: Brenda Halstead of Random Thoughts of a Scrapbooker

Cricut Machine and Tools Used: Expression 2 AE and Gypsy

Cricut Cartridge(s) Used: Mickey and Friends, Mickey Font, Pooh and Friends

Other Supplies Used: CTMH stamps and ink, Stampin’ Up! cardstock, Recollections cardstock

Save The Date Card

Image

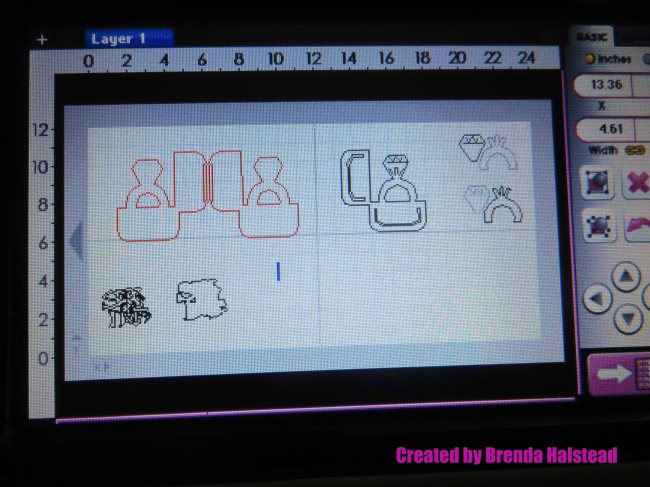
Hello! Brenda from Random Thoughts of a Scrapbooker here. My daughter is getting married in August 2015, and I made this Save The Date card to send out. I used the Sweethearts Cricut cartridge to make this. I flipped and welded the shape for the base of the card. The base of the card and the layers are 4 1/2″. I cut off the ring part of the black layer. I also used the hide and contour feature for the ring. “Save the Date” phrase and shadow were cut at 2″. I used the D’vine Swirls Cuttlebug embossing folder on the black layer of the ring box. The white and black cardstock are Bazzill and the silver and silver prismatic cardstock were bought at Hobby Lobby.

I used my Gypsy to make the cuts, and here is a picture of my Gypsy screen.

Image

Thanks for stopping by!

Designed By: Brenda Halstead

Cricut Machine and Tools Used: Cricut Expression and Gypsy

Cricut Cartridge(s) Used: Sweethearts

Other Supplies Used: Bazzill cardstock, Hobby Lobby cardstock

Sentimental Saturday – Halloween Card

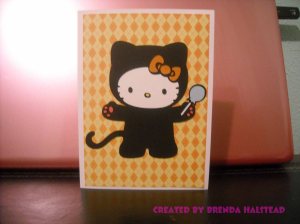
Hello, Brenda from Random Thoughts of a Scrapbooker here. I was planning to post a wedding card today, but I’m still working on it. So I’m posting a Hello Kitty Halloween card I made last year for my daughter.

DSCN0839     DSCN0840

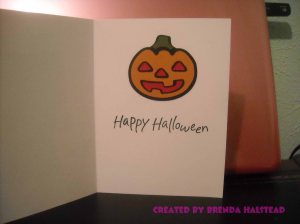
I used the Hello Kitty Greetings Cricut cartridge to cut Hello Kitty and the pumpkin. Hello Kitty was cut at a 4 1/2″ and the pumpkin was cut at 2 1/2″. All cardstock is Bazzill. The base is white cardstock, and the patterned paper is something that was in my stash. The stamp used for the sentiment was purchased at Michaels.

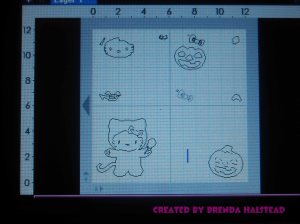
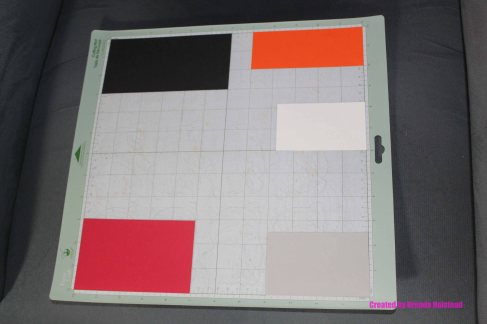
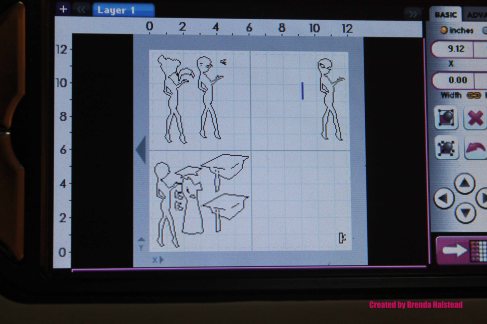
I used my Gypsy to lay out my cuts on the mat so I knew where to place the different colors of cardstock and could cut everything at once. Here are pictures of my Gypsy screen and the cardstock on the mat.

DSCN0835     DSCN0838

If I get the wedding card done later, I’ll post it as well.

Thanks for visiting!

Designed by: Brenda Halstead

Cricut Machine and Tools: Cricut Expression and Gypsy

Cricut Cartridges Used: Hello Kitty Greetings

Other Supplies Used: Bazzill, stamp

Sentimental Saturday – Birthday Card & Graduation Card

Hello, Brenda here with two cards for CricutDIVA’s Sentimental Saturday. I’m showing two cards because last week there was a graduation card posted that is very similar to mine.

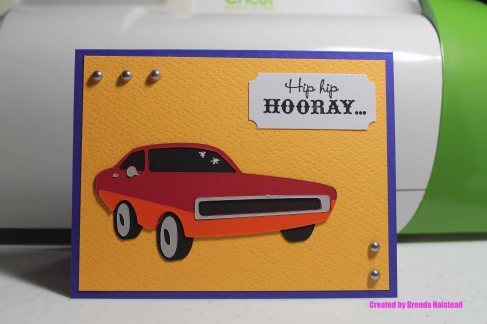
First, here is the birthday card I made for my son.

Image

Image

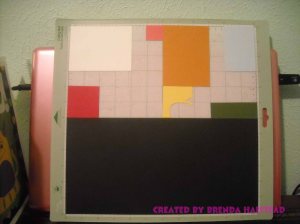
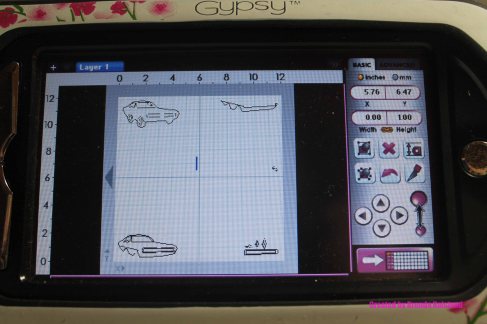
All cardstock is Recollections. This is an A2 card (5 1/2″ x 4 1/4″). The yellow layer is 5 1/4″ x 4″. The car is from the Groovy Times Cricut cartridge (page 49) and was cut at 2″. I used my Gypsy to lay out all the cuts on my mat, and here is a screenshot of my Gypsy and a picture of my mat:

Image

Image

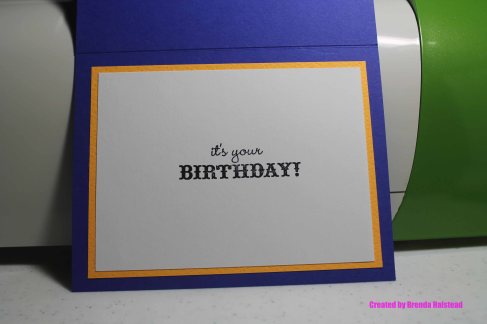
I ended up not using the white stars for the windshield of the car, because it was so small that it didn’t cut well. Instead, I used a white gel pen to put the stars on the windshield. I used an EK Success tag punch to make the tag and the sentiment on the front and inside of the card is from the Close To My Heart Card Chatter – Birthday stamp set. I then added silver Queen & Co. pearls to the front. The yellow mat on the inside of the card measures 5″ x 3 3/4″, and the white mat measures 4 3/4″ x 3 1/2″.

Now let me show you the graduation card I made. It is a tri-shutter card, which is the first one that I’ve made.

ImageImageImage

The dark blue solid cardstock for the base is Bazzill, and the patterned paper is from the SEI Field Notes paper pack. I used the Paper Dolls Teen Scene Cricut cartridge to cut the girl graduate(page 30) at 5″. The cap was cut at 2 1/4″ using the Creative Memories This & That Cricut cartridge. The sentiment is from the TPC Studio Class Act stamp set.

I also used my Gypsy to make the cuts, and here is the screenshot of my Gypsy as well as pictures of my mat.

Image

ImageImage

If you enjoyed my cards and would like to see some of my other work, please visit my blog at http://happyscrapper64.blogspot.com/

Have a happy, scrappy day!

Designed by: Brenda Halstead

Cricut Machines & Tools Used: Cricut Expression 2 Anniversary Edition, Gypsy and EK Success Tag Punch

Cricut Cartridges Used: Groovy Times, Paper Dolls Teen Scene and Creative Memories This & That

Other Supplies Used: Queen & Co. pearls, CTMH stamps, TPC Studio stamp

What it means to love you layout

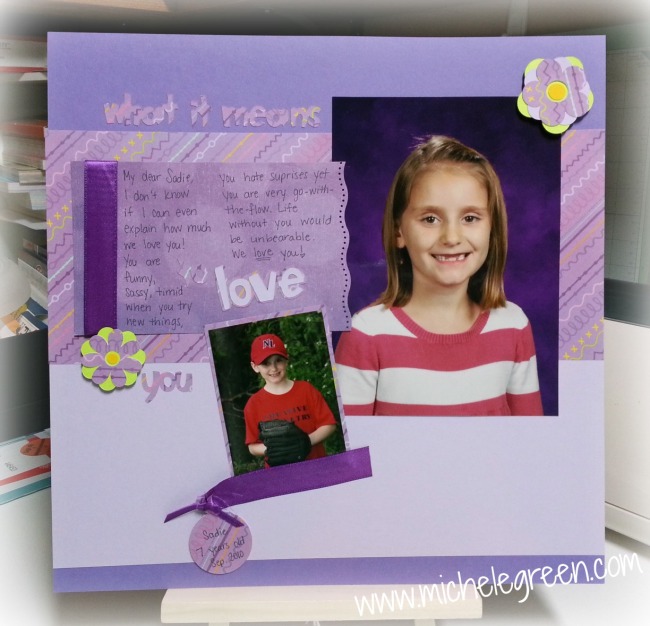
Hello! Michele here to share a layout with you today. This is my very first post on CricutDIVAs and I am excited to be here! Today’s layout features my daughter and why I love her. I hope this will become a cherished page when she thumbs through the old books when she is an adult. Scrapping is about preserving memories and telling our stories. I hope she enjoys this one about her – just her and nothing else.

Image

The Cricut cuts involved here are:
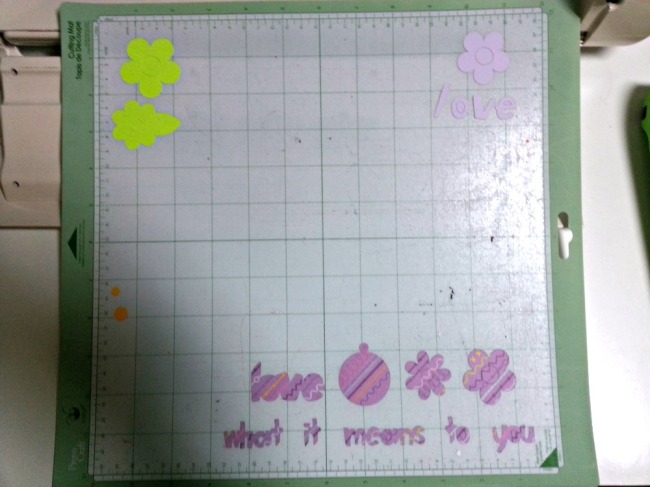
The title is the font on the Cupcake (a Lite cart – if you haven’t checked out this font, you are missing out big time!) “what it means to you” was welded and cut at 0.75″.  “love” and it’s welded shadow were cut at 1.05″.

The flowers are two variations from Hello Kitty Greetings and were cut at 2″ and 1.3″.
The circle tag is from Doodlecharms and was cut at 1.6″.

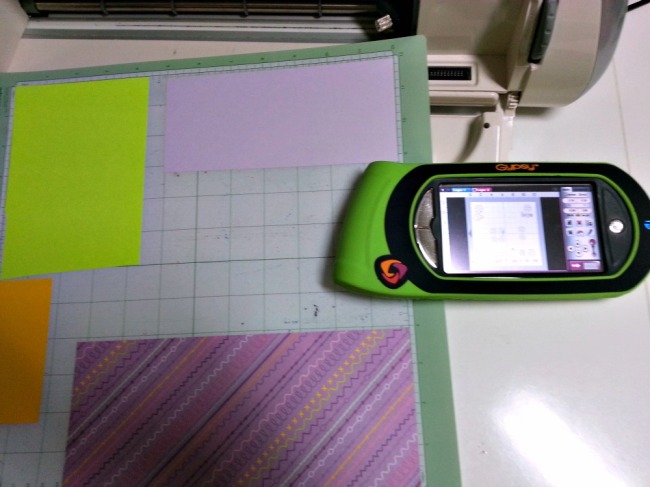
To get these sizes just right, I pulled out my Gypsy. I haven’t used it in awhile but it fired right up and connected with my Expression just fine. (I have not attempted to update it recently or link it to CCR at any time. In fact, it’s probably been at least six months since I turned it on!) Don’t you just love how you can make all of your cuts at once on the Gypsy?

Before cutting:

Image

After cutting:

Image

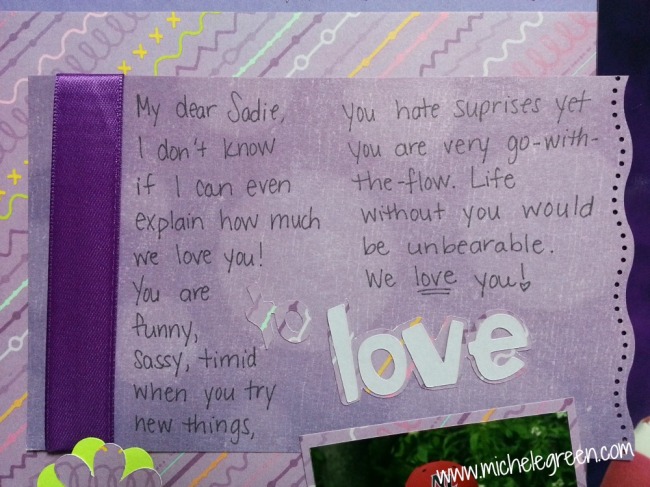
Here is a close-up of the journaling, in case you are wondering what it says:

Image

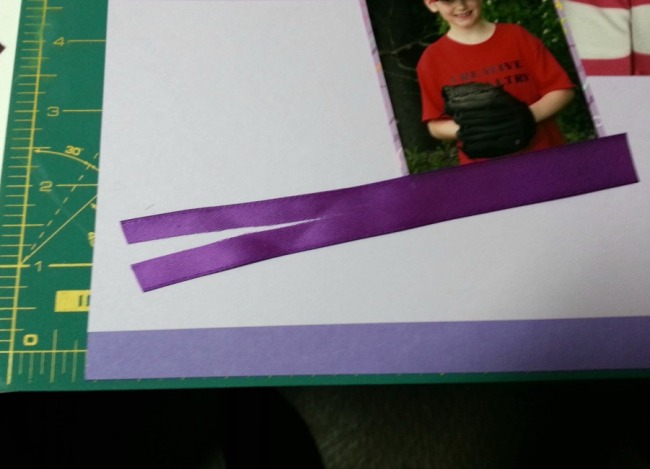
One last little trick for you. I tied a simple knot around the tag at the bottom of the layout.  To keep it simple and not create bulk with an additional piece of ribbon, I simply sliced the end of the ribbon in two, threaded it through the hole and tied a knot around. This keeps the bulk down in the page protector.

Image

I hope you have enjoyed my first layout here on CricutDIVAs and I hope you will keep coming back for more!  Feel free to visit me on my regular blog where this month you will see a layout each day as I am participating in Lain Ehmann’s Layout a Day in May 2013!

Baseball Pennant

cricutDIVA image
Hi!!!  Lori here from ScrappinMyStressAway and I am so excited to share my very first CricutDIVA post with you today!!
My middle son is graduating from High School in just over a month (sniff, sniff). He is also a baseball player (catcher) and I have been working very hard at making his graduation party decorations.
I was inspired by a post on Pinterest to create my centerpiece.
I started with my Gypsy Girl and opened a 12×24 mat.
I used the shadow of this pennant from Locker Talk sized to width 15.24 x height 7.12.
Once I sized the shadow layer to 7.12 inches, I put all of the pieces for the banner on layers of my Gyspy all sized to 7.12 inches.
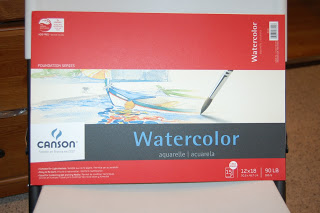
I used watercolor paper to cut out the base of my pennant. Watercolor paper is very sturdy and it cuts well on the cricut.  I use it for banner flags and mini album pages too.
I used multi-cut of 2 and the blade depth at 5 (which is the depth I use for cardstock).
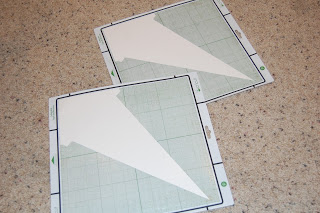
I put the pennant in the next layer of my Gypsy, sized the same. I wanted the pennant to be white and the tassles to be blue, so I hung the tassles off the mats.
I cut out two in white cardstock, one for each side.  I trimmed off the edges and adhered one piece to each side of the watercolor paper layer.
In Gypsy Layer 3, I put the tassels, borders and the numbers from Varsity Letter sized to 2.28 inches.
I cut them out in blue paper (I call this shade Titan Blue for my son’s high school).
In Gypsy Layer 4, I put the baseball layer from Boys Will Be Boys sized to 6.15 inches.
On the bottom half of the mat, I put the numbers from Varsity Letter sized to 2.28 inches.
I also put the graduation cap from Recess sized to 1.82 inches.
I cut out the baseball in white cardstock and the rest in black cardstock.
I decided later I wanted a second graduation cap so I copied and pasted one to the next Gypsy layer along with the base of the baseball. I cut them out in black cadstock.
I opened a final Gypsy layer and kept the eyeball open on the tab so I could see the baseball base (shown in grey). I copied the baseball onto this layer and sized it to 6.74 inches to create a shadow. I cut the layer out in blue cardstock.
I adhered the blue tassels on the pennant. I cut several strands of twine and tied a knot in the center. I used my ATG gun to adhere them to the blue tassels. Once adhered, I trimmed the edges of the twine.
I used my Sew Easy to punch holes in the border piece. I used the red and white twine to stitch around the edges.
I pop-dotted the border piece to the pennant.
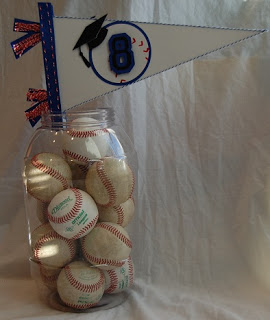
I adhered the baseball layers and pop-dotted the number 8 (Tyler’s jersey number) and the graduation cap to the pennant.
I used a liquid glue pen to adhere blue and white twine to the edges of the pennant.
Here you can see the dimension.
On the other side of the pendant, I adhered the numbers and pop-dotted the second graduation cap.
Before I adhered the border to the pennant, I used ATG to adhere a wilton cookie/cake pop stick to the pennant. I reinforced the stick with some tape.
I pop-dotted the border on with an extra layer of pop dots to account for the height of the stick.
Here is the reverse side of the pennant.
This will be a fun center piece for one of the food tables at Tyler’s graduation party.
Thanks for stopping by today!
You can see more of my work on my personal blog HERE.

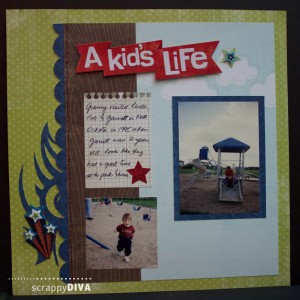
A Kid’s Life

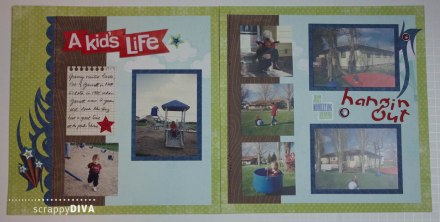
Two page layout spreads are my favourite of all because I usually have quite a few pictures for a given story.

IMG_3552

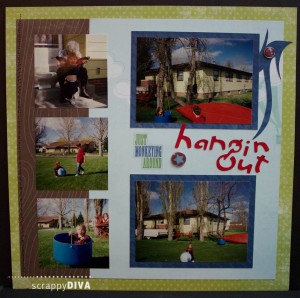
This layout is no exception. While all this happened on the same day, my mom, sister and nephew were playing in different locations. The first page shows them at a playground and the second page shows them at home, in their backyard.

I used some ready-made embellishments on this page, but I also cut out several pieces with my Cricut.

IMG_3558

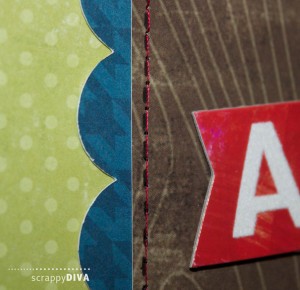
The scalloped border on the left side of the first page was cut with Plantin Schoolbook. I was at a crop when I worked on that part of the layout so I used my Gypsy to weld three pieces together to fit the length of my paper and cut it with my Cricut Mini.

IMG_3560

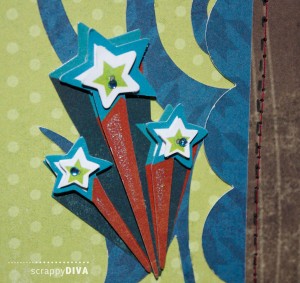
Indie Art is the cartridge I used for the decorations on the sides of the layout.

IMG_3557

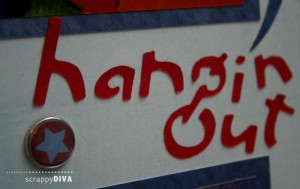
I used Locker Talk to cut out the words “hangin out” on the 2nd page. This portion I did at home after the crop so I used Cricut Craft Room on my Mac and my Expression 2 to cut it out.

IMG_3561

The paper series I used was Lime Twist by My Mind’s Eye.

IMG_3556

If you would like to see more of my work, please visit my blog at ScrappyDIVAblog.com or my YouTube channel.