Boo Banner

Hello Divas!  Lori here with a Halloween Banner.
I know it is a little early, but Halloween is my very favorite holiday and I start early every year with my decorations!!!
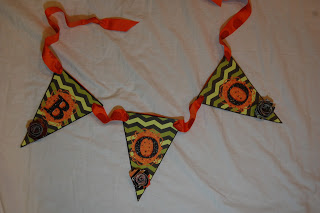
Today I made a BOO Banner to share with you.  I used my Gypsy and Cricut Expression to decorate my it.
I used BOO! from CTMH Artiste sized to 2 inches.  I used Hide Contour to hide the inside cuts and the “!”.  I cut this out of glitter cardstock.  When I use glitter cardstock, I reverse the image (I am showing the original image here) and place my cardstock glitter side down.  I use multi-cut 2.  When I am done, I wash my mat with dish soap and a scrubbie to get the glitter off.
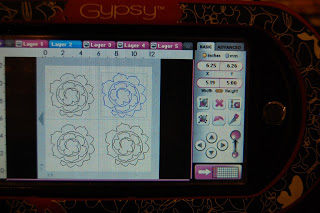
I cut these 3D flower shapes from CTMH Art Philosophy sized to 5 inches.  I rolled them up with my McGill tweezers and used liquid glue on the center to hold them together.
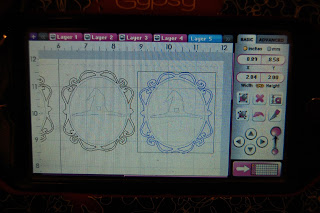
I needed something to mount the letters on.  I cut this image from Teresa Collin’s Chic and Scary sized to 3 inches.  I used Hide Contour to hide the inside cuts (oval and witch hat).
I used papers from my Halloween stash for all of my cuts.
I cut the triangles out of chipboard.  I traced and cut the paper to fit.  It was later (after I cut the paper) that I thought to cut everything out on the cricut…. at least I only had 3 banner flags!!
After I adhered the green paper to the banner flags, I used black acrylic paint to paint the edges.
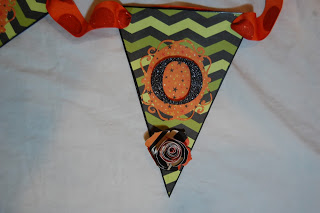
Here is a close up of the 3D flower that I rolled up.  You can also see that I pop-dotted the letters onto the orange paper.
I finished the banner off with some orange ribbon.
I hope you have as much fun decorating for Halloween (or fall) as I do!!!
You can see more of my work HERE.

Summer Fun Mini Album

Hello ~ Lori here from ScrappinMyStressAway!!
cricutDIVA image
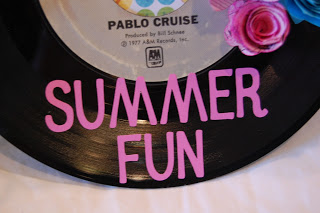
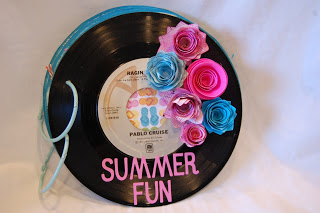
I found these 45 records at the thrift shop and thought they would make fun mini album covers!!
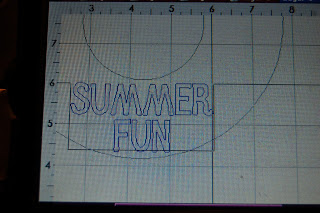
I re-created the record on my Gypsy using two circles sized 7 inches and 3 inches.
I used vinyl for SUMMER FUN using the font Cherry Limeade sized to .75 inches.
I sized my letters by leaving the layer with the “record” on it open.  That way I knew my title would fit.
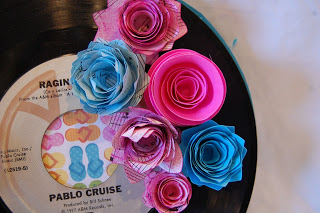
I cut out 3D flowers from Atriste sized from 3 – 5 inches out of sheet music and cardstock.
I inked the sheet music to match the cardstock.  I used my tweezers to roll up the flowers and liquid glue to adhere them.  I attached them to the cover with glue dots.
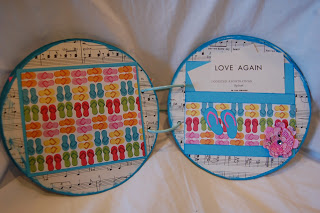
I traced and cut out chipboard circle pages and covered them with sheet music.  I painted the edges of the pages with a bright blue acrylic paint.
I made some photo mats and cut out some flip flops and beach tags to attach to the corners.
I cut out a wave and some fish and tied the tops with twine.
I like to make a pocket for my mini albums and include tags or coordinating paper scraps.
I cut out layered flowers from Mother’s Day Bouquet sized from .88 – 2.53 inches.  I cut them out of sheet music.  Cutting did not go well as the paper is on the thin side, but I got enough to make my flowers.
I cut out some images from Life is A Beach.  The flip flops are 1.82 inches.  The tags are 1.75 inches.  The gecko is 3 inches.  I cut the images out in cardstock.
I tied a little twine on the  tags.
I attached the gecko to the back cover.
I hope you like my unique mini album.  I had a lot of fun making it!!
You can see more of my work on my BLOG!!

Graduation Cards ~ Sentimental Saturday

Happy Graduation Cards!!
cricutDIVA image
Hello – Lori here with some Graduation cards to share!!! Welcome to Sentimental Saturday where we post card projects only!!
My middle son is graduating next month and he has a lot of friends. I am making a LOT of graduation cards!!! I typically don’t like to mass produce my work, but in this case I would drive myself crazy (and run out of time) if I didn’t!
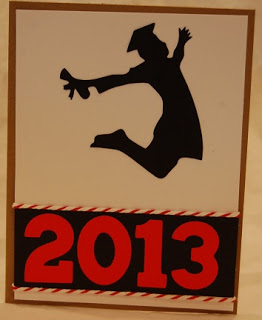
I did use a file from Silhouette to cut out the jumping graduate and hats. I am new to Silhouette but I still prefer the Gypsy. I can file all of my project pieces in one place and refer back to them when I need measurements for blog posts.
I LOVE having the option to open several layers in a project too. This project has 12 Layers and three card designs.
I used CTMH Artiste for the scalloped circle. I sized them to 4.62 inches (3 inches using Real Size).
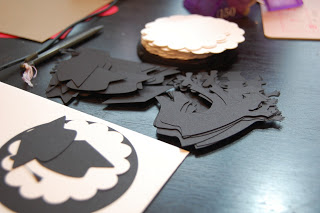
On one page, I hid the outer circle so I cut out the scalloped circle. I cut these out in white cardstock.
On the second page, I hid the inner scalloped circle and cut out the shadow circle.  I cut these out in black cardstock.
I used Birthday Bash for the numbers and sized them to 1.25 inches.
I custom the colors of the numbers to match the school. I have an entire page of 2013 to cut out in blue for my son’s school. The red and maroon are for some of his friends from other schools.
I used my 5″ Xyron to put adhesive on my numbers.
I saved a piece of the leftover cuts to use as a stencil. I placed my numbers inside the template and carefully peeled off my blue “leftover” paper. I do this to line up my letters (or in this case numbers) perfectly every time!
I added some matching twine and stickles to finish the card front.
I punched a 2″ circle and stamped the sentiment inside.
This card I did a little different on the outside.
I am off to finish the blue cards!!!
Thanks for stopping by!!
You can see more of my work on my personal blog:  http://www.scrappinmystressaway.blogspot.com/